|
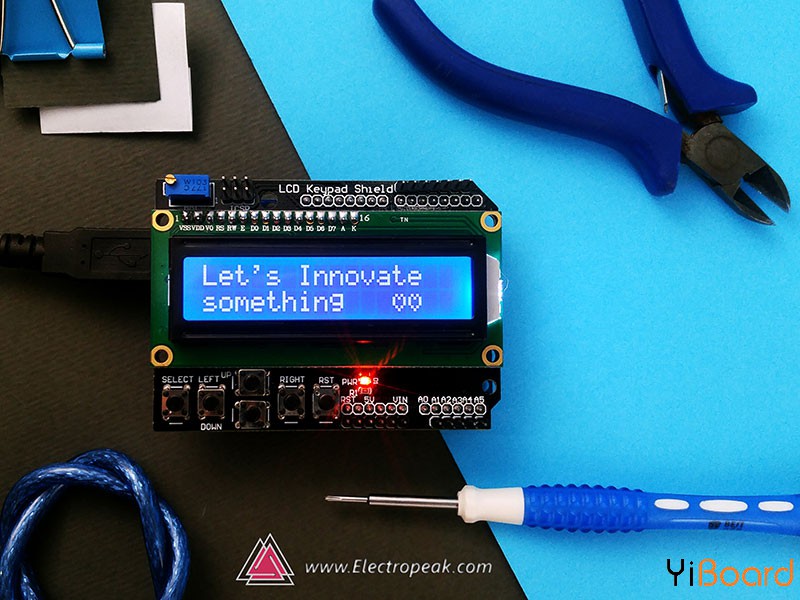
在本篇文章中,您将学习到如何基于Arduino开发板使用LCD键盘扩展板,并制作实际的项目。

1602 Arduino LCD键盘扩展板的功能 在电子项目中显示信息一直是最引人注目的问题。有多种方式可以显示数据。这些液晶屏可以很简单,例如7段或LED,或者它们可以更加迷人,例如LCD。使用LCD一直是最流行的信息显示方式之一。 LCD分为两种通用类型:字符和图形。
最常见,最便宜和最简单的LCD之一是字符LCD。该LCD由多行和多列组成。字母和数字写在由行和列创建的位置。例如,LCD字符16 * 2有2行16列。所以它可以显示32个字符。
使用这些LCD非常简单,它们与所有微控制器和处理器开发板完全兼容。为了更方便地使用这些LCD,1602的显示屏模型(包括用于制作菜单的四个按键)被制成一个扩展板,它也与Arduino板兼容。
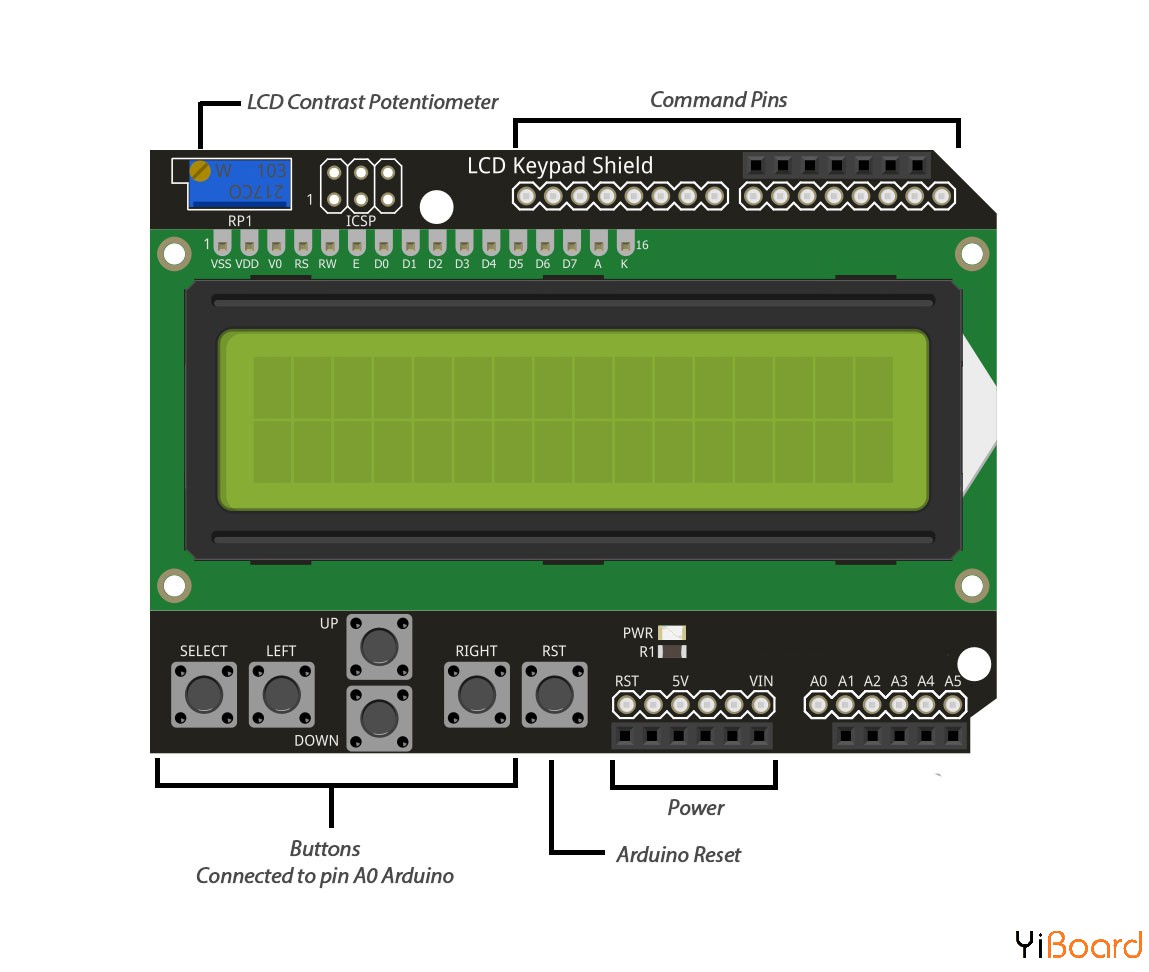
如何使用Arduino LCD键盘扩展板 Arduino扩展板是一个用户友好且简单的扩展板。要使用它,您首先需要知道它的引脚排列及其与Arduino的连接。

Arduino引脚 | 扩展板引脚 | 8 | LCD RS | 9 | LCD Enable | 7 | LCD D7 | 6 | LCD D6 | 5 | LCD D5 | 4 | LCD D4 | 10 | LCD背光 | A0 | 按键 |
所需的材料 ● Arduino Uno R3开发板 ● 适用于Arduino的1602 LCD键盘扩展板 ● Arduino IDE
如何读取按键? 在该扩展板中,所有4个按键都连接到模拟引脚A0,节省数字引脚。所以我们应该使用ADC来读取它们。当您按下某个键时,它会根据内部电阻分离电路向A0引脚返回一个值,通过该电路识别该键的类型。 按键名称 | A0模拟值 | RIGHT | 0-60 | UP | 60-200 | DOWN | 200-400 | LEFT | 400-600 | SELECT | 600-800 |
- /*
- Arduino 2x16 LCD - Detect Buttons
- */
- #include <LiquidCrystal.h>
- //LCD pin to Arduino
- const int pin_RS = 8;
- const int pin_EN = 9;
- const int pin_d4 = 4;
- const int pin_d5 = 5;
- const int pin_d6 = 6;
- const int pin_d7 = 7;
- const int pin_BL = 10;
- LiquidCrystal lcd( pin_RS, pin_EN, pin_d4, pin_d5, pin_d6, pin_d7);
- void setup() {
-
- lcd.begin(16, 2);
- lcd.setCursor(0,0);
- lcd.print("Electropeak.com");
- lcd.setCursor(0,1);
- lcd.print("Press Key:");
- }
- void loop() {
- int x;
- x = analogRead (0);
- lcd.setCursor(10,1);
- if (x < 60) {
- lcd.print ("Right ");
- }
- else if (x < 200) {
- lcd.print ("Up ");
- }
- else if (x < 400){
- lcd.print ("Down ");
- }
- else if (x < 600){
- lcd.print ("Left ");
- }
- else if (x < 800){
- LCD.print ("Select");
- }
- }
让我们深入研究一下代码: - #include <LiquidCrystal.h>
我们需要包含字符LCD库。 - LiquidCrystal LCD( pin_RS, pin_EN, pin_d4, pin_d5, pin_d6, pin_d7);
根据连接到Arduino的引脚定义LCD对象。 通过指定列数和行数来初始配置LCD。第一个参数是列数,第二个参数是行数。
以下是使用LCD的一些重要函数: 函数名称 | 功能说明 | | lcd.clear(); | 清除LCD液晶屏的显示内容 | | lcd.print(data); | 以字符串或数字显示信息 | | lcd.setCursor(col,row); | 更改起点位置 | | lcd.scrollDisplayLeft(); | 将光标向左移动一个块 | | lcd.scrollDisplayRight(); | 将光标向右移动一个块 | | lcd.creatChar(num,data); | 创建所需的字符(字符号码,字符串) |
如何实现滚动文字? 我们可以使用上述函数轻松完成。 - /*
- Arduino 2x16 LCD - LCD Scroll
- */
- #include <LiquidCrystal.h>
- const int RS = 8;
- const int EN = 9;
- const int d4 = 4;
- const int d5 = 5;
- const int d6 = 6;
- const int d7 = 7;
- const int pin_BL = 10; // arduino pin wired to LCD backlight circuit
- LiquidCrystal lcd( RS, EN, d4, d5, d6, d7);
- void setup() {
- lcd.begin(16, 2);
-
- lcd.print("Electropeak");
- delay(1000);
- }
- void loop() {
- // scroll 11 positions ("Electropeak" length) to the left
- for (int positionCounter = 0; positionCounter < 11; positionCounter++) {
- lcd.scrollDisplayLeft();
- delay(400); //Scrolling speed
- }
- // scroll 27 positions ("Electropeak" length + display length) to the right
- for (int positionCounter = 0; positionCounter < 27; positionCounter++) {
- lcd.scrollDisplayRight();
- delay(400);
- }
- // scroll 16 positions (display length) to the left
- for (int positionCounter = 0; positionCounter < 16; positionCounter++) {
- lcd.scrollDisplayLeft();
- delay(50);
- }
- delay(1000);
- }
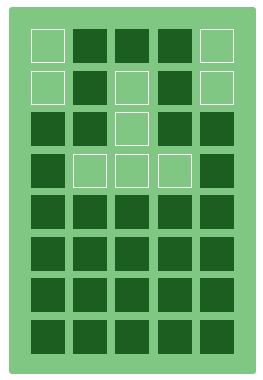
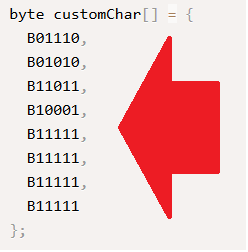
如何显示特定字符? 您可以通过LCD在每个块中创建一个字符。 为此,您应将所需的字符转换为代码数组,然后将其显示在LCD上。 要将字符转换为代码,您可以使用一些在线的转换网站。 设计字符,然后将生成的数组复制到代码中。


- /*
- Arduino 2x16 LCD - LCD Special Char
- */
- #include <LiquidCrystal.h>
- const int RS = 8;
- const int EN = 9;
- const int d4 = 4;
- const int d5 = 5;
- const int d6 = 6;
- const int d7 = 7;
- const int pin_BL = 10; // arduino pin wired to LCD backlight circuit
- LiquidCrystal lcd( RS, EN, d4, d5, d6, d7);
- // smily face
- byte smiley[8] = {
- B00000,
- B10001,
- B00000,
- B00000,
- B10001,
- B01110,
- B00000,
- };
- // Battery sign
- byte battery[] = {
- B01110,
- B01010,
- B11011,
- B10001,
- B11111,
- B11111,
- B11111,
- B11111
- };
- // arrow right
- byte R_arrow[8] = {
- B00000,
- B00100,
- B00010,
- B11111,
- B00010,
- B00100,
- B00000,
- B00000
- };
- // arrow left
- byte L_arrow[8] = {
- B00000,
- B00100,
- B01000,
- B11111,
- B01000,
- B00100,
- B00000,
- B00000
- };
- // Ohm sign
- byte ohm[8] = {
- B00000,
- B01110,
- B10001,
- B10001,
- B10001,
- B01010,
- B11011,
- B00000
- };
- // Heart
- byte heart[8] = {
- B00000,
- B01010,
- B10101,
- B10001,
- B10001,
- B01010,
- B00100,
- B00000
- };
- int i = 0;
- void setup() {
- lcd.begin(16, 2);
- lcd.createChar(0, smiley);
- lcd.createChar(1, battery);
- lcd.createChar(2, R_arrow);
- lcd.createChar(3, L_arrow);
- lcd.createChar(4, ohm);
- lcd.createChar(5, heart);
- lcd.createChar(6, ohm);
lcd.createChar将您的数组存储在内存位置,您可以使用lcd.write显示该数组。
以上就是本篇文章的全部内容。如果遇到任何问题,请随时在本帖下面进行回复。 |
 |手机版|YiBoard一板网
( 冀ICP备18020117号 )