|
在本篇文章中,我们将主要介绍如何使用MicroSD卡适配器模块和Arduino Uno开发板实现读写SD卡。该模块的主要优点是可以与Arduino IDE随附的SD库一起使用。 SD库可以使卡的初始化、读取和写入操作变得非常容易。

所需的材料清单: – Arduino Uno开发板 – 跳线 – MicroSD卡适配器模块 – MicroSD卡
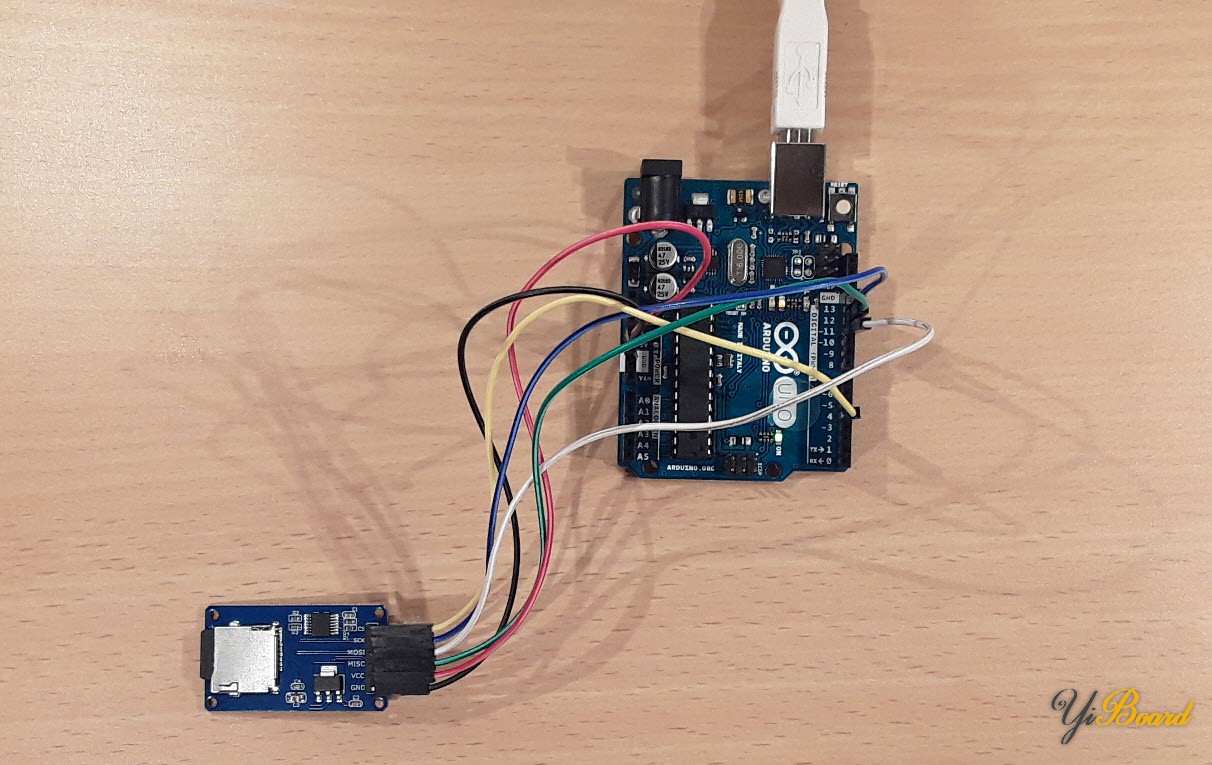
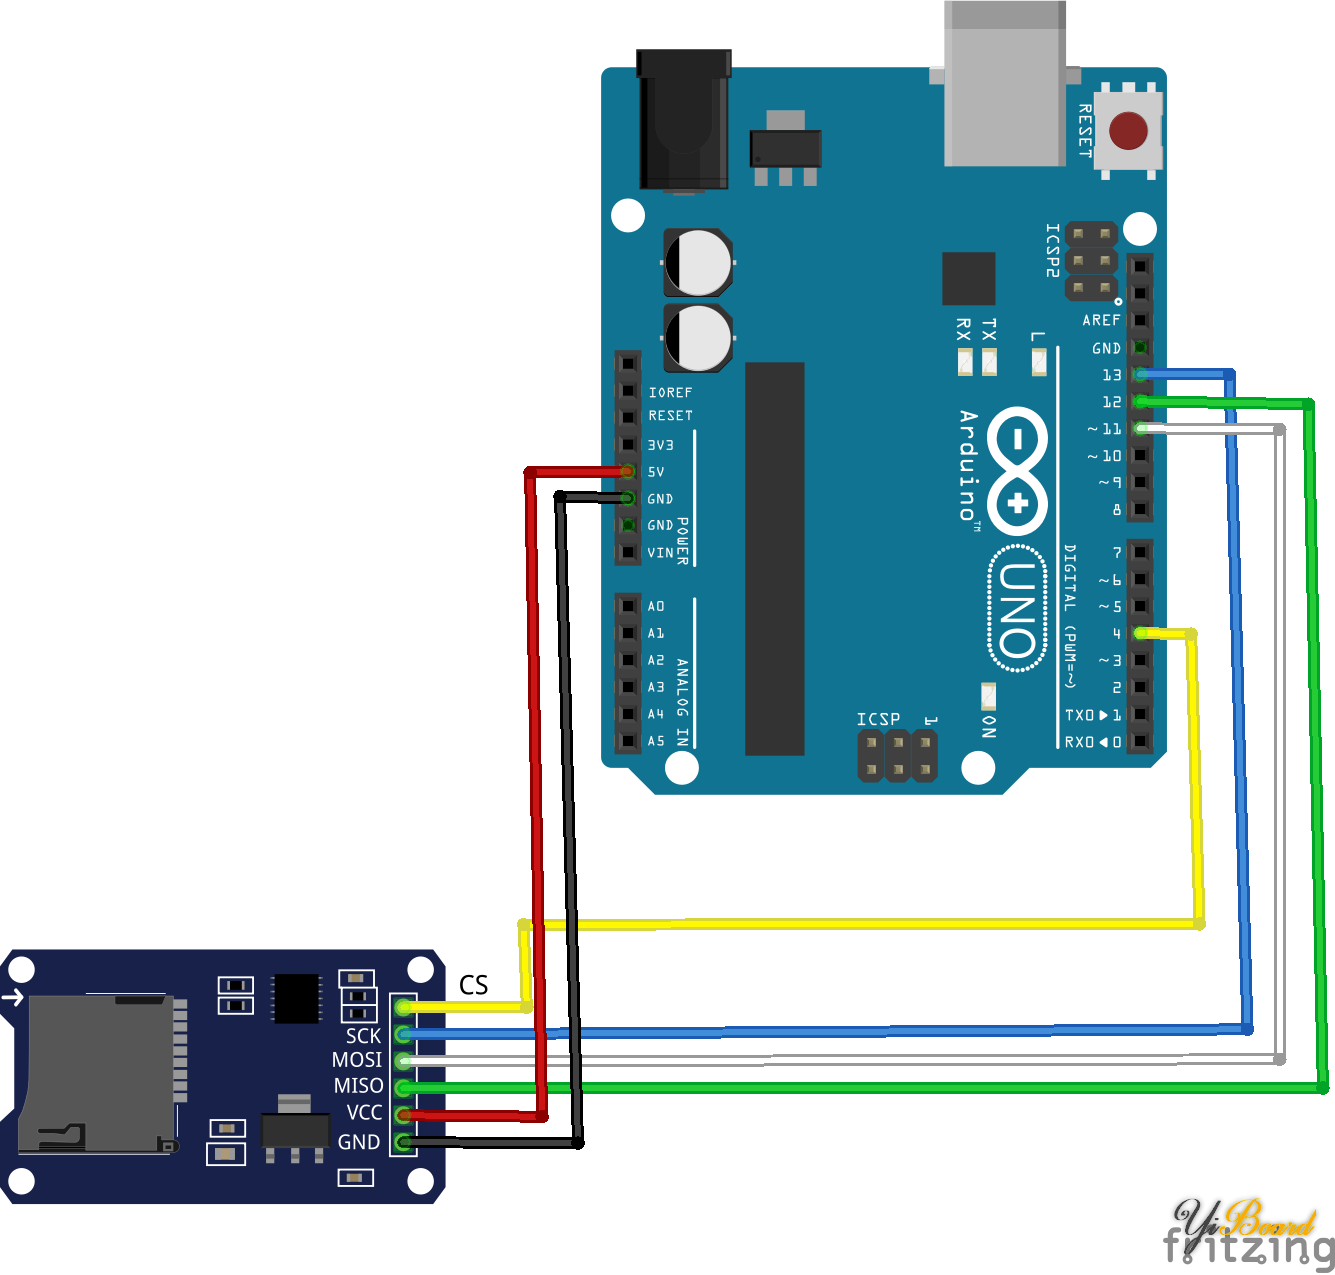
如何将MicroSD卡适配器模块连接到Arduino Uno? 该模块板载有一颗稳压器。因此,可以将Arduino的5V和3.3V引脚用作电源。该模块通过SPI(串行外围接口)与Arduino Uno通信。下表显示了完整的引脚连接。 MicroSD卡适配器 | Arduino Uno | CS | 4 | SCK | 13 | MOSI | 11 | MISO | 12 | VCC | 5V | GND | GND |

如何对SD读卡器进行编程? 如前所述,使用Arduino IDE的标准SD库时,读写SD卡非常简单。确保使用最新版本的SD库(Sketch-> Include Library-> Manage Libraries->搜索“ SD”)。例如,本文中版本1.1.0不适用于该模块。幸运的是,版本1.1.1可以正常工作。此外,SD卡必须格式化为FAT16或FAT32。如果某些事情没有按预期工作,则调试时始终将库的CardInfo示例((File -> Examples-> SD-> CardInfo)上载到Arduino,并读取串口监视器的消息。
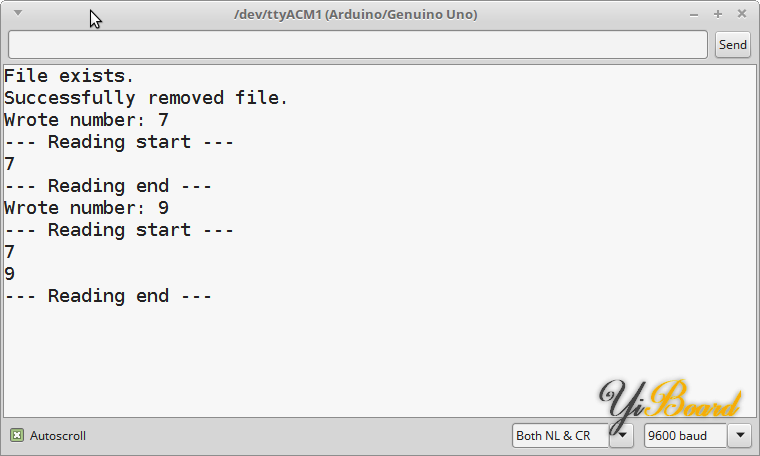
在本文的代码中,0到9之间的随机数被写入SD卡。该数字被写入名为“ file.txt”的文件。接下来,读取“ file.txt”的内容。在loop函数结束时,添加了5秒的延迟。请注意,启动Arduino时,将检查是否存在名为“ file.txt”的文件。如果存在,该文件将被删除。 - #include <SD.h> //Load SD library
- int chipSelect = 4; //chip select pin for the MicroSD Card Adapter
- File file; // file object that is used to read and write data
- void setup() {
- Serial.begin(9600); // start serial connection to print out debug messages and data
-
- pinMode(chipSelect, OUTPUT); // chip select pin must be set to OUTPUT mode
- if (!SD.begin(chipSelect)) { // Initialize SD card
- Serial.println("Could not initialize SD card."); // if return value is false, something went wrong.
- }
-
- if (SD.exists("file.txt")) { // if "file.txt" exists, fill will be deleted
- Serial.println("File exists.");
- if (SD.remove("file.txt") == true) {
- Serial.println("Successfully removed file.");
- } else {
- Serial.println("Could not removed file.");
- }
- }
- }
- void loop() {
- file = SD.open("file.txt", FILE_WRITE); // open "file.txt" to write data
- if (file) {
- int number = random(10); // generate random number between 0 and 9
- file.println(number); // write number to file
- file.close(); // close file
- Serial.print("Wrote number: "); // debug output: show written number in serial monitor
- Serial.println(number);
- } else {
- Serial.println("Could not open file (writing).");
- }
-
- file = SD.open("file.txt", FILE_READ); // open "file.txt" to read data
- if (file) {
- Serial.println("--- Reading start ---");
- char character;
- while ((character = file.read()) != -1) { // this while loop reads data stored in "file.txt" and prints it to serial monitor
- Serial.print(character);
- }
- file.close();
- Serial.println("--- Reading end ---");
- } else {
- Serial.println("Could not open file (reading).");
- }
- delay(5000); // wait for 5000ms
- }
如果一切正常,则串口监视器应显示类似的输出,如以下屏幕截图所示:

|